How To Create Admin Subdomain In Cloudflare with Nginx Proxy using Docker with SSL
Introduction I have my main website, which I run on Lets say: . Now, there is my…
May 02, 2021
In this post, we will see:
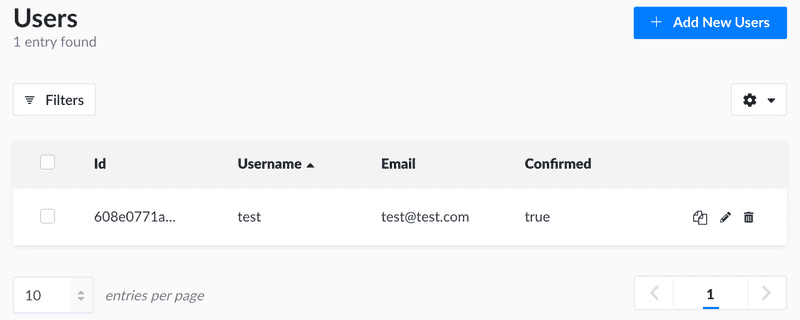
So far, we have seen How to Configure permissions on Article

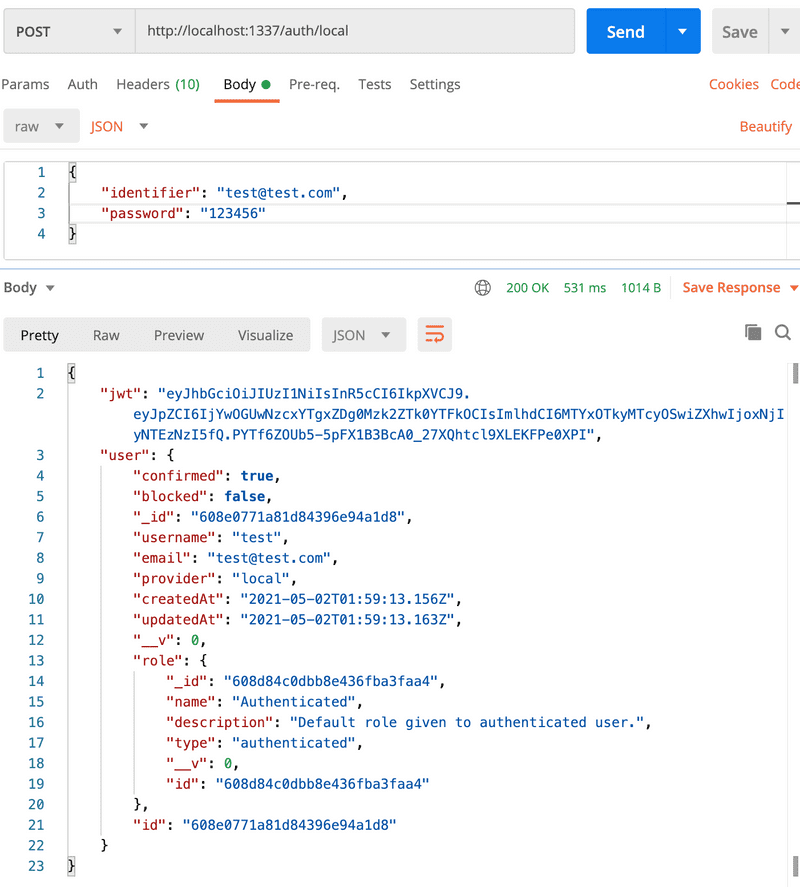
The REST end point for this is:
POST /auth/local

Body:
{
  identifier: "email",
  password: ""
}

As you can see, once we authenticate user by REST API, we get a jwt token. Which will be used for authenticated other APIs, like create/update/delete.
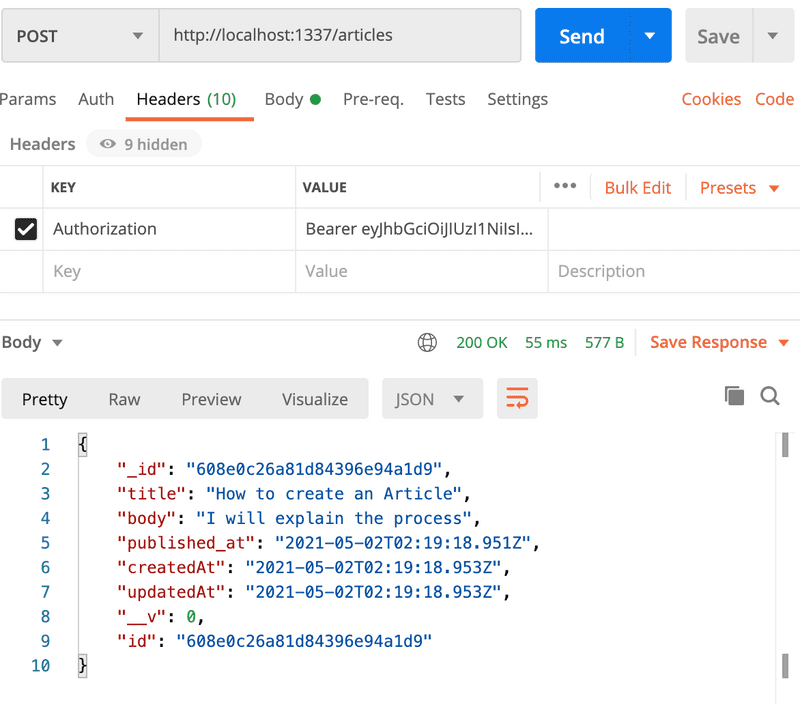
POST /articles

Body:
{
  title: "",
  body: ""
}

Header:
Authorization: Bearer <jwt token>

The process will remain same, only HTTP method will change
PUT /articles

Body:
{
  title: "",
  body: ""
}

Header:
Authorization: Bearer <jwt token>The process will remain same, only HTTP method will change
PUT /articles/<id>

Header:
Authorization: Bearer <jwt token>So far we have configured that authenticated users can create/update/delete articles. But, we do not want that any authenticated user will update other author’s articles.
We need to do little tweaking in strapi. Lets follow.
Till now, there is no information saved that who created a particular article. Lets starting saving it.

Now, we need to start saving user information with created articles. For this, we need to write little code.
Open /api/article/controllers/article.js
Replace file content with following:
const { parseMultipartData, sanitizeEntity } = require('strapi-utils');

module.exports = {
  /**
   * Create a record.
   *
   * @return {Object}
   */

  async create(ctx) {
    let entity;
    if (ctx.is('multipart')) {
      const { data, files } = parseMultipartData(ctx);
      data.author = ctx.state.user.id;
      entity = await strapi.services.article.create(data, { files });
    } else {
      ctx.request.body.author = ctx.state.user.id;
      entity = await strapi.services.article.create(ctx.request.body);
    }
    return sanitizeEntity(entity, { model: strapi.models.article });
  },
};
Save it.
Now when you submit the create article request again, you will have author information saved with each article. A sample response will look like:
{
    "_id": "608e66f33c976e44787564c4",
    "title": "How to create an Article2",
    "body": "I will explain the process",
    "published_at": "2021-05-02T08:46:43.948Z",
    "createdAt": "2021-05-02T08:46:43.952Z",
    "updatedAt": "2021-05-02T08:46:43.959Z",
    "__v": 0,
    "author": {
        "confirmed": true,
        "blocked": false,
        "_id": "608e0771a81d84396e94a1d8",
        "username": "test",
        "email": "[email protected]",
        "provider": "local",
        "createdAt": "2021-05-02T01:59:13.156Z",
        "updatedAt": "2021-05-02T01:59:13.163Z",
        "__v": 0,
        "role": "608d84c0dbb8e436fba3faa4",
        "id": "608e0771a81d84396e94a1d8"
    },
    "id": "608e66f33c976e44787564c4"
}Again, we will need to write little code for this.
Open same file again: /api/article/controllers/article.js
Add following code:
  /**
   * Update a record.
   *
   * @return {Object}
   */

  async update(ctx) {
    const { id } = ctx.params;

    let entity;

    const [article] = await strapi.services.article.find({
      id: ctx.params.id,
      'author.id': ctx.state.user.id,
    });

    if (!article) {
      return ctx.unauthorized(`You can't update this entry`);
    }

    if (ctx.is('multipart')) {
      const { data, files } = parseMultipartData(ctx);
      entity = await strapi.services.article.update({ id }, data, {
        files,
      });
    } else {
      entity = await strapi.services.article.update({ id }, ctx.request.body);
    }

    return sanitizeEntity(entity, { model: strapi.models.article });
  },
In above code, while receiving update article request. We are checking if the authenticated user is the author of article asked. If yes, proceed else reject the call.
Similarly to restrict that users can delete only their articles. Write below code in same file: /api/article/controllers/article.js
async delete(ctx) {
    const { id } = ctx.params;

    let entity;

    const [article] = await strapi.services.article.find({
      id: ctx.params.id,
      'author.id': ctx.state.user.id,
    });

    if (!article) {
      return ctx.unauthorized(`You can't update this entry`);
    }

    if (ctx.is('multipart')) {
      const { data, files } = parseMultipartData(ctx);
      entity = await strapi.services.article.delete({ id }, data, {
        files,
      });
    } else {
      entity = await strapi.services.article.delete({ id }, ctx.request.body);
    }

    return sanitizeEntity(entity, { model: strapi.models.article });
},In next post, we will see how to setup a Slug(Nice URL) system.
Introduction I have my main website, which I run on Lets say: . Now, there is my…
Introduction In this post, we will use in Next.js with strapi. And, we will…
Introduction In our last post, we have seen a full example of Next.js with…
Agenda I will cover following in this post: Prepare Docker image for Next.js app…
Introduction Next-auth is a fantastic library for abstracting handling of…
Introduction In this post, we will do following: create a Next.js project…
Introduction In this post we will see following: How to schedule a job on cron…
Introduction There are some cases, where I need another git repository while…
Introduction In this post, we will see how to fetch multiple credentials and…
Introduction I have an automation script, that I want to run on different…
Introduction I had to write a CICD system for one of our project. I had to…
Introduction Java log4j has many ways to initialize and append the desired…